Step-by-Step Instructions for Upgrading Your PowerMaster Firmware
 Download Software
- Browse to the Technical Library and download the firmware for the PowerMaster 3 Series, 4 Series and 7 Series units.
- Save the file to your desktop or downloads folder.
- Right click to unzip the downloaded file.
- Copy the file to an USB drive.
 Install Software on PowerMaster Unit
- Insert the USB drive into the PowerMaster unit
- Power on the unit and connect the power supply to AC power.
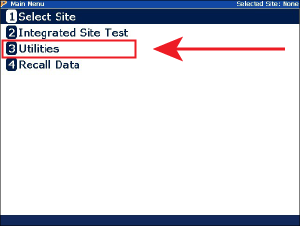
- From the Main Menu, select Option 3, “Utilities.”
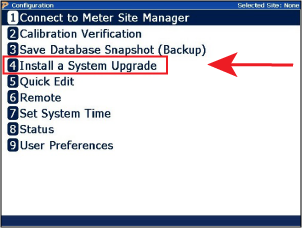
Depending on your version of firmware, either press 4 “Install System Upgrade” or press 6 for “System”.
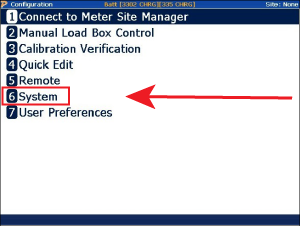
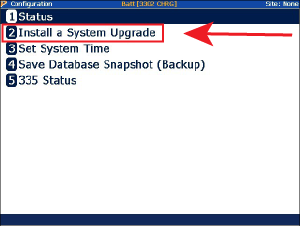
If you pressed 6 for “System”, now press 2 to “Install Systems Upgrade”. Otherwise, proceed to the next step.
 Update Application
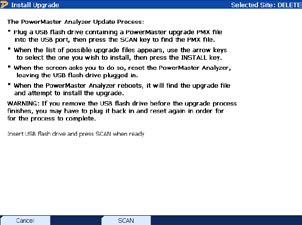
1. Press F3 to scan. Once again, verify the unit is plugged into AC Power.
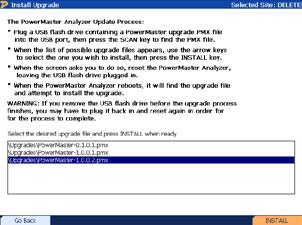
2. Select the .PMX upgrade file and press F6 to install
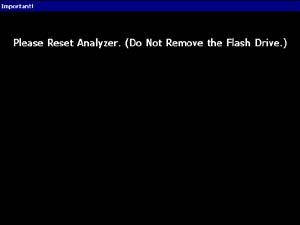
3. After recognition, reset the PowerMaster® by turning off then turning back on

4. After power up, the PowerMaster® will run the update application automatically (this may take several minutes)

5. After installation, reset the PowerMaster® by turning off then turning back on
If you need further support, please don’t hesitate to contact:
Ray Gore
Product & Technical Support
PH: 865-218-5888
Cell: 865-414-3562
Email: Ray.Gore@tec-usa.com